Beginners Quilting Instructions

Trip Around the World

Making Quilts
Quilting can be as simple or as complicated as you want it to be. The patterns range from straight lines sewing squares or strips together to using set in seams for blocks with a 3D visual effect. The purpose of this article is to introduce the methods of quilting; the basics may then be utilized to construct more complicated blocks and patterns.
One thing I will stress before we get started, is start small. By starting small I mean a wall hanging, not a queen size quilt (ahem, guilty). By starting with a smaller project you will also be able to determine if this particular method is for you or if you wish to move on to quicker methods.
Materials Needed
Before you start quilting, it is recommended you have some basic tools on hand. There are many cool gadgets available for quilters, but the basics are all you really need to get started. The time-saving gadgets can only be appreciated by those who have learned the old-fashioned way.
- Fabric - 100 percent cotton is the preferred choice for quilting. You will need enough fabric for the squares (these can be scrap pieces, as they will be cut into squares) as well as half a yard for the borders and at least two yards for the backing.
- Scissors - if possible, have one pair for cutting fabric and another for cutting paper and template materials
- Needles - sewing and quilting
- Thread - sewing and quilting
- Template material - paper works, but plastic is better. Template material is available, but using the lid from a plastic container works just as well.
- Graph paper
- Freezer paper (for paper piecing projects)
- Pencil and crayons
- Batting
- Quilting frame or large embroidery hoop
- Tape measure and yard stick
- Safety pins (size 1) and straight pins
- Iron and ironing board
Quilt Layout

10 Steps to Preparing Your Quilt
One of the easiest quilts to make when first learning is the Trip Around the World. It is constructed completely of squares and may be made using any size square you please. It is planned by using rounds but will be sewn together in rows.
- Make a template using the finished size of your square. For example, if you want the squares to be three inches, cut your template three inches.
- Draw out your design on the graph paper, using one color for each round. (See photo to the right) For ease in construction, I suggest five different prints repeated twice.
- Select your fabrics.
- Determine how many squares of each color you will need to cut by following your pattern.
- Trace your template on the wrong side of the fabric using pencil, leaving at least half an inch between squares (you will add the seam allowance as you cut out your pieces). Note: do not use permanent marker (for obvious reasons) or disappearing ink (your lines will fade away; not something you want to happen if you will be taking more than a 24 hour period to make your quilt.)
- Cut out the pieces (don't forget to add the seam allowance) and set in piles. You may wish to mark each pile with a letter code (such as A,B,C,D and E).
- Starting with your center square (round one), lay out your pieces on a table or other flat surface. Refer to your graph paper for placement.
- When the squares are placed to your satisfaction, mark the top of each row with a row number using scrap pieces of paper and a safety pin in the top square.
- Keeping the first square on top, make a pile for each row. Put square one on square two, square two on square three, etc. Do not mix up the order or the top will not come out right.
- Keep the squares of each row together with a single thread put through the middle - pierce a needle and thread downward through all squares, then back up again. Do not tie.
Quilting Methods
Which is your preferred method of quilting?
Assembling the Top
Once your rows of squares are stacked, it is time to start sewing them together.
- Take the first two squares from the top of your Row 1 pile. Place them right sides together, and line up the marked line. Using a running stitch, sew along the line from corner to corner. be sure to secure the stitching at both ends.
- Finger press open, being sure the row marker is at the top. Press seam toward top of the row. (You will alternate this direction with each row.)
- Add the third square in the same manner, being sure to secure stitching. Always press open so to avoid wrong placement of squares.
- Continue adding the squares for Row 1. When the row is complete, set it aside and repeat for the next rows. Remember to press the seam allowances in the opposite direction of the first row. This will ensure the corners are not bulky.
- When all of the rows are complete, you may wish to press them with a steam iron. This will make sewing the rows together easier as they will be lying flatter.
- Next, sew the rows together, making sure Row 1 is first, then Row 2, Row 3, etc. It is quite easy to get confused, which is why I suggest the row markers stay on until the quilt top is complete.
Adding a Border
For the sake of simplicity, only one border will be added to this particular quilt.
- Choose one of your colors to frame the quilt.
- Measure across the center to get your top and bottom border measurement. Draw a seam line the length of your measurement by the width of your border. I would suggest a two inch border. Add a 1/4 inch seam allowance.
- With your border fabric right sides together with your top, stitch along the top and bottom of the quilt top, securing the stitching at the ends and occasionally along the seam line.
- Press open with an iron.
- Measure the center of the quilt top to get the side border measurement. Follow the same steps for marking your fabric and stitch the side borders on. Press open.
Congratulations! Your quilt top is complete!
Making the Sandwich
- To make your quilt "sandwich", lay out your backing fabric wrong side up on a table or other flat surface.
- Spread the batting onto the backing fabric and smooth out any wrinkles or creases with your hands.
- Lay the quilt top down next, right side up. Starting in the center, smooth out any wrinkles or creases. Be sure there are at least two inches of batting and backing extending beyond the quilt top on all four sides.
- Pin baste the layers together by pinning with safety pins every few inches. Start at the center and work your way outwards.
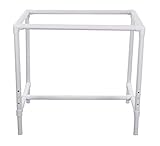
Quilting Frame
Quilting the Layers
When basting is complete, place in a frame and quilt the layers together using quilting thread. The easiest pattern to start with is "in the ditch", which is along your seam lines. This will ensure your lines are straight and there are no additional preparations needed.
Personal note: the frame in the capsule to the right is great for any size quilt, as long as all four sides fit within its parameters. I have used it for quilts varying in size from crib to king, and it works perfectly. The nicest thing is it can be disassembled and stored under the bed or in a closet when not in use (which is where mine sits at this time). The tension can easily be adjusted as well, and it is lightweight and portable enough to be used at home, the cabin or on the deck (which I have done - there's nothing better than quilting in all natural light).
Binding and Finishing Your Masterpiece
When the quilting stage is complete, press the quilt with an iron.
- Trim the batting even with the quilt top.
- Trim the backing half an inch larger than the top on all sides.
- Fold it in half toward the quilt and press with an iron.
- Bring the fold over the top and blind stitch in place all around the top.
- Sign and date your masterpiece - you never know, it may become a family heirloom and future generations would want to know who made it. The best way to do this is by using embroidery floss and a basic back stitch.


")
